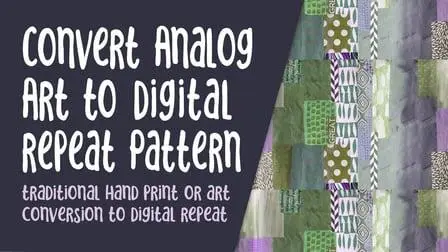
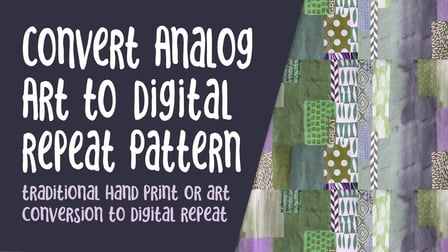
Convert Conventional Art or a Fabric Print from Analog to Digital into a Seamless Repeat Tile
MP4 | Video: h264, 1280x720 | Audio: AAC, 44.1 KHz
Language: English | Size: 1.07 GB | Duration: 1h 13m
MP4 | Video: h264, 1280x720 | Audio: AAC, 44.1 KHz
Language: English | Size: 1.07 GB | Duration: 1h 13m
Have you ever wanted to convert your own hand-drawn patterns into digital patterns repeats to be used for fabric, clothing, wallpaper, or even gift wrap? In this course you'll learn how to transform your traditional art into print-ready patterns. This class is for pattern designers, graphic designers, illustrators, artists, crafters and anyone else who is interested in learning how to use existing art and turn into digital format using Adobe Photoshop. You'll learn my method for creating a digital repeat using Adobe Photoshop. We'll start working with analog materials then refine and multiply the basic pattern swatch in Photoshop, patching and blending wherever necessary to create the seamless repeat. By the end of this class, you will have a digital repeat pattern ready for printing on a product of your choice or onto yard goods like fabric or wallpaper.
Adobe Photoshop is an indispensable tool for surface pattern designers to translate their vision into a striking design and a printable, repeating pattern. However, even with the power of Photoshop, creating a pattern often meant repeating steps and careful calculations which could be time-consuming, and could cripple the creative process. In the past, the designer had to work on the foundational tile and the overall pattern, simultaneously paying close attention to both. Yeesh! Thankfully, in Photoshop 2021, a new feature has been added to help us out: The Pattern Preview.
You will be guided step-by-step through the process of producing the epeating pattern design, using the rubber stamp tool wherever necessary. This tool can be used alone or in conjunction with selections. Not sure what that means? You will see. Alternately, we will also use selections. With the selections we will do more than patching. We will use it to isolate elements from the background to use on the seams to help disguise the joins. It works perfectly! We will use all three versions of the lasso tool, with different applications of each. There is much to learn about making selections, and this will be a great introduction.
In this class I’ll walk you through:
my step-by-step method for making seamless patterns from an existing artwork
making selections for isolating elements
my workflow for use of layers and other great features
adjusting patterns to perfect the flow and adding elements in the second iteration of the design
fully seamless background creation
methods for adjustments and recoloring
The verbal guidance and demonstrations will help you learn all the necessary core skills that can be applied to so many of your future designs. Whether you are new to surface pattern design, or a fairly seasoned designer who has been using Photoshop with calculations and measurements to repeat your patterns, the new Pattern Preview will change your life! If you’re an aspiring pattern designer with a good basic knowledge of Photoshop, you’ll be able to go through all the steps. This class will benefit anyone who wishes to simplify creation of seamless patterns and methods to improve efficiency.
The key concepts I will include:
review of my pattern alterations and adjustments methods
approaches you can take in your creative work
This is an ideal class for you, even if you are not sure what you will use the pattern for, whether it be for fabric design on sites like Spoonflower, scrapbooking paper, custom web graphics, or whatever! Learning new Photoshop workflows is always desirable. I guarantee you will create something really appealing, and it’s so much fun, once you get the hang of it!
Intro to Convert Analog to Digital Pattern Repeat in Photoshop
This short intro will give you an overview of the class.
Lesson 1: Discussing the Overview and Objectives
In this lesson, I will show you the objectives for class and explain the merits of the technique I use.
Lesson 2: Using the Rubber Stamp Tool
In this lesson, I will show you the experiments I did with the rubber stamp tool and talk about next steps.
Lesson 3: Creating the Seamlessness of the Tile
In this lesson, I will explain the settings and sizing of the brushes. I will show you some of the key techniques I use and explain every step of the way. By the end of the lesson, you will have the repair of one of the circles done, with the use of the rubber stamp, mainly.
Lesson 4: Using Selections for Repairs
This is the lesson in which I teach you about creating the seamless tile. We are left with an obvious area that needs to be filled. I show you a bunch of adjustments for selections as we work our way through this lesson. I also demonstrate using the rubber stamp tool to work on making the tile seamless.
Lesson 5: Creating the Swatch
In this lesson, we start getting to the nitty gritty of the final swatch. You will see me use several different techniques to for making and adjusting, then finally testing the swatch. I will show you a technique for adjusting the color and for using the levels control to adjust the tonal values.
Lesson 6: Final Pattern Testing and Correcting
At this stage, we pull our layout together, and I will correct the small details that make it work. I use areas of the artwork to isolate into motifs we can use with our repeat. We take a quick look at color adjustments and talk about next steps. This will show you just how versatile this technique can be and how valuable experimentation is in your development as a surface pattern designer.
Lesson 7: Conclusion, Mockup and Next Steps
We will conclude everything in this lesson. I show you a couple of quick mock-ups with the pattern and we end with a chat about next steps.
Concepts covered:
Concepts covered include but are not limited Photoshop repeat patterns, the new Photoshop Pattern Preview tool, making selections with the lasso too, using the magnet lasso tool, using the rubber stamp tool, converting analog to digital patterns, isolating and repeat individual elements, using layer adjustments like Hue and Saturation and Levels, techniques with blending, and much more.
You will get the bonus of…
1 hour and approx 5 minutes minutes of direction from an instructor who has been in graphic design business and education for over 40 years
knowledge of multiple ways to solve each design challenge
an outline with links to further research
a list of helpful online sites to further your education into surface pattern design.


