Foolproof Shading Techniques With Blend Modes In Procreate
Published 12/2022
MP4 | Video: h264, 1280x720 | Audio: AAC, 44.1 KHz
Language: English | Size: 885.26 MB | Duration: 0h 44m
Published 12/2022
MP4 | Video: h264, 1280x720 | Audio: AAC, 44.1 KHz
Language: English | Size: 885.26 MB | Duration: 0h 44m
With 10 Texture and Inking Brushes and a Color Palette Included
What you'll learn
Learn a step-by-step method for making a textural illustration
Learn to create compositions with a simple and appealing background
A simple workflow for use of layers and other great features like clipping masks
Methods for adjusting blending modes to create perfect shadows and highlights
Requirements
No pre-requisite is required but experience with Procreate is an asset
Description
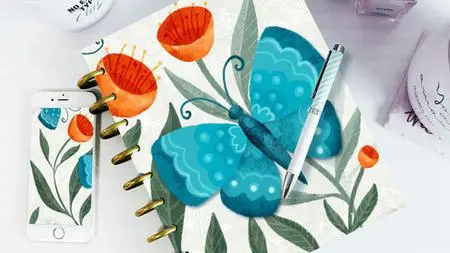
Do you love textural digital illustrations as much as I do? Foolproof Shading with Blend Modes in Procreate is the perfect class for beginner artists just getting into the wide world of texture. We will draw a textured digital illustration of a stylised butterfly from start to finish. In this class, you'll learn how to use layered texture and color to add depth and visual interest to your illustrations, but we will be doing it with a foolproof method utilizing blending modes. We’ll look at how to create overall background textures, how to use texture to create highlights and shadows, and how to use blending modes to add details in your illustrations.With this class you are entitled to the set of the texture brushes I have created to help you add multi-dimensional texture to your work. The set is comprised of 10 different textures that range from my dry ink brush to subtle crackles and rust stains. First, we’ll create a simple leaves and butterflies illustration, and then we will look at how to use texture and blending modes to add highlights and shadow to shapes. Throughout the class I will demonstrate how super simple flat shapes can easily be turned into illustrations with depth and contrast. With my techniques you cannot be go wrong!You can find the downloads and resources here:In this class I’ll walk you through:my step-by-step method for making a textural illustrationtips for creating compositions with a simple and appealing backgroundmy workflow for use of layers and other great features like clipping masksadjusting blending modes to create perfect shadows and highlightsmethods for filling the background and adding textureThe project for this class is a textured butterfly illustration using processes we covered in the class. This class will benefit anyone who wishes to simplify creation highlights and shadows that are never wrong.The key concepts I will include:Procreate blending modesuse of clipping masksapproaches you can take in your creative workIf you are striving to become a better illustrator, this class will give you tons of strategies. My goal is to make it as foolproof as possible with techniques you can use over and over again.Intro to Easy Watercolour Seamless Patterns in Procreate using BrushesThis short intro will give you an overview of the class.Lesson 1: Overview and Document Set UpIn this lesson, I will give an overview of the document set-up. I explain the merits of using a rough sketch, which I demonstrate creating. We will look at the use of my favorite original ink brush, Del’s Dry Inker. I also show you quickly how the blending modes will help you to create shading.Lesson 2: Blocking in the Initial ColorIn this lesson, I will break down the complete process of how to do a super fill of the butterfly and flower shapes. I show you painting the leaves, stems and flowers as I explain the reasoning behind the choices I make with layers.Lesson 3: Experimenting with Blend ModesIn this lesson, I will explain the use of the multiply blending mode which allows us to use the exact color we have on the main flower or leaf paintings as our shadow color. It takes the guesswork out of the whole process and ensures we have a cohesive color palette.Lesson 4: Adding Screened Highlight DetailsThis is the lesson in which I show you the use of the screen blending mode to add details to the flowers and leaves. Again, we will use the exact color we used on the base. I explain more details about the use of the clipping mask, and I explain some of the idiosyncrasies of the Dry Ink Brush.Lesson 5: Final Details on MotifsIn this lesson, we will be finalizing all the flower and leaf details and we will also work on the background. I show you some texture brushes I am giving you as well as showing you a couple of Procreate built-in brushes. We continue to use blending modes and experiment with the use of the curves filter. We are one step closer to finalizing our design now.Lesson 6: Final Texturing and FinishingAdding all the finishing touches is the focus of this lesson. We start by duplicating our stems and leaves to help fill in the background. We experiment with blending modes there and talk about opacity. We employ sizing and compositional strategies. I will be adding all the textures into the piece and then further enhancing all the foreground items as well. I show you my original piece and compare it to the one we produced in class.Lesson 7: Conclusion, Mockup and Next StepsWe will conclude everything in this lesson. I show you a couple of quick mock-ups with the pattern and we end with a chat about next steps.Concepts covered:Concepts covered include but are not limited to Procreate, Procreate brushes, filling with the recolor tool, layering, blending modes, Procreate brush stamps, Procreate symmetry guides, adjusting Procreate brushes, adding texture with brushes, procreate brushes for adding other interesting details, workflow best practices, painting best practice, Procreate composites, techniques with paints and blending, use of blending modes to assist in shading and dimension, and much more.You will get …52 minutes of direction from an instructor who has been in graphic design business and education for over 40 yearsknowledge of multiple ways to solve each design challengean outline with links to further researchProject DescriptionWhat I would like to see you do for this project is a combination of plants and a flying creature. It can be a butterfly, a dragonfly, a bee or a flying beetle of some sort. Remember, the technique is loose and casual, and texture is the finishing touch. Use the color palette provided or create one of your own but remember to keep it limited. The star of the show is using the exact same color for the highlights and shadows, along with lending modes.
Overview
Section 1: Introduction
Lecture 1 Introduction
Lecture 2 Blocking in the Initial Color
Lecture 3 Experimenting with Blend Modes
Lecture 4 Adding Screened Highlight Details
Lecture 5 Final Details on Motifs
Lecture 6 Final Texturing and Finishing
Lecture 7 Conclusion, Mockup and Next Steps
This course is for students wishing to learn a foolproof method for shading and highlights


