


How To Design Your Own Guitar
How To Design Your Own Guitar
Last updated 9/2018
MP4 | Video: h264, 1280x720 | Audio: AAC, 44.1 KHz
Language: English | Size: 2.06 GB | Duration: 4h 45m
Last updated 9/2018
MP4 | Video: h264, 1280x720 | Audio: AAC, 44.1 KHz
Language: English | Size: 2.06 GB | Duration: 4h 45m
An informal guide to designing your own guitar
What you'll learn
By the end of the course you will understand the guitar design process and be able to create a full scale working drawing of an electric guitar
an overview of the design process
guitar anatomy - wood, parts, hardware
understand the difference between main construction methods - bolt on, set and neck-thru
how to make key design decisions at each stage
drawing techniques
how to complete your own working drawing
top tips
much more
Requirements
NO previous knowledge of guitars, drawing or design is needed
pencil, sharpener and rubber
large blank paper around 1.2m/ 4 feet min (wallpaper/liner roll is ideal)
Rulers - 150mm or 300mm(6 or 12 inch) and 1000mm (40 inch)
Drafting square (or protractor from drawing set)
a roll of masking tape or 4 spring clips
tracing paper
a table or board to work
Description
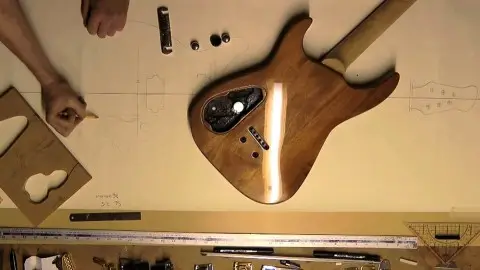
Why design your own guitar? Designing your own guitar is fun and working through the design process is a great way to gain a better understanding of the instrument. If you like guitars, this is a really interesting way to spend a few hours, but also a great starting point if you want to get a custom guitar made, or build your own. You could just follow a pre-made plan but it is much more rewarding to design completely from scratch. You can let your imagination run wild as guitars can be virtually any shape. A working drawing is essential if you intend to build the guitar and an invaluable way to communicate your ideas to your guitar maker should you decide to have it made for you. Overall Aim To begin with a blank sheet of paper and work through the entire design process, making vital decisions as you go. You will finish with a custom guitar drawing of your very own. Step by Step The course will guide you step by step through the guitar design process from the perspective of a professional builder. The design will be a real working drawing of a guitar and the course is intended to give you the best possible chance of success if you do go ahead and build. The guitar designed in this course will be made in the next course - Build Your Own First Guitar. Over and over again You will need only a few inexpensive items to complete your drawing. These along with the course material can be used over and over again as many times as you want until you find the perfect design! How long will it take? Drawing a shape for your guitar is the easy bit. Making sure all the important bits are in the right place and that it will actually work as a musical instrument requires a little work. It will take a couple of hours to go through the process the first time as there is a lot of information to cover but once you have completed the course and understand the process will become easier and quicker. Whats included The course contains full instructions and a library of templates to create your own original guitar design and working drawing. It covers all aspects of designing a solid body electric guitar, including vital information on construction styles, wood, hardware, bridges, tuners, pickups , electrics and much more! Library of templates (downloadable PDF’s) are included for tracing, to aid in your drawing. Pickups: single coil, humbucker, P90Control Cavities and LayoutsStandard and Floyd Rose TremHeadstocks and Tuner LocationsNeck joints: Bolt on, set neck and neck thru Why I wrote it There is much myth and confusion around the world of guitar design. This course aims to fix that and help to avoid many of the common mistakes made by the unwary. Whats possible These instructions cover only solid body electric guitars. Acoustic, semi-acoustic and archtop guitars have other aspects of the design like bracing which is beyond the scope of this book. Left hand or right hand Left handed designs can also be drawn using this method. Whenever you see this symbol LH read the note and it will tell you what to do, usually this will be simply turning the tracing over.
Overview
Section 1: How to make a working drawing
Lecture 1 Promo
Lecture 2 Introduction
Lecture 3 Guitar Anatomy
Lecture 4 Tools for Drawing
Lecture 5 Drawing Techniques
Lecture 6 The drawing process - an overview
Section 2: Making the Working Drawing
Lecture 7 Mark the centreline
Lecture 8 Mark the Nut
Lecture 9 Mark the Scale length
Lecture 10 Marking the bridge and fretboard
Lecture 11 Mark the Headstock
Lecture 12 Mark the pickups and tracing
Lecture 13 Mark the Body shape
Lecture 14 Mark the Controls and Electrics
Section 3: Final Stages
Lecture 15 Guitar Body Styles
Lecture 16 Bits and Bobs - Strap pins, and inlays
Lecture 17 Final check
Lecture 18 Final Summary - What's Next?
Section 4: Bonus Lectures and Optional Extras
Lecture 19 Wood: Part 1 - The Neck
Lecture 20 Wood: Part 2 - The Body
Lecture 21 Neck Join Styles
Lecture 22 Parallel Headstock Design
Lecture 23 Truss Rods
Lecture 24 Frets
Lecture 25 Guitar Bridge options
Lecture 26 Intonation
Lecture 27 Pick Ups
Lecture 28 Binding
Lecture 29 Finishes
Section 5: Resources
Lecture 30 The Plan
Lecture 31 Where to Get Stuff - Useful Links
Lecture 32 Tools
Anyone interested in guitars, guitar making and guitar design