


A Quick Way To Build A Realistic Scene In Blender
A Quick Way To Build A Realistic Scene In Blender
Published 10/2023
MP4 | Video: h264, 1920x1080 | Audio: AAC, 44.1 KHz
Language: English | Size: 2.09 GB | Duration: 2h 7m
Published 10/2023
MP4 | Video: h264, 1920x1080 | Audio: AAC, 44.1 KHz
Language: English | Size: 2.09 GB | Duration: 2h 7m
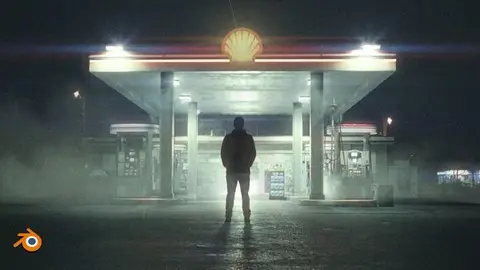
Extend photo with 3d, 2h step-by-step tutorial
What you'll learn
I will introduce you to the free 3d program Blender
I will introduce you to modeling, texturing, lighting, rendering, post-processing and more
I will show you how to create a cinematic scene in the best way
I'll show you how to get a realistic scene in blender more easily
I will teach you how to properly extend image in Blender
Requirements
Free software Blender. No previous experience is necessary.
Description
Creating a fully CGI scene is fun but also a time-consuming job and requires a lot of skills to make everything look realistic. From modeling or finding models, texturing, lighting, post-processing, etc. But what if we already have a photo or video that we just want to extend with some elements?In this tutorial, we will talk about exactly that. How to extend a photo with 3D elements in a free program blender.We'll talk about how to import an image and camera into a blender with the correct perspective.How to set lighting, shadows, and reflection to match the photo.How to enrich the visual boring and low-resolution textures.Where to find and how to add overlays that will make the scene more cinematic.We will talk about post-processing color grading and much more.At the end of this tutorial, you will be able to extend any photo with any 3d elements and get more realistic renders in a faster way.All resources and links are included + final .blend fileNo previous blender experience is required for this tutorial. The tutorial is step-by-step and is also intended for beginners.Part 1 - Inspiration and preparation (7 min)Part 2 - F-spy (14 min)Part 3 - Blender, camera, and character import (7 min)Part 4 - Combining background image and render (5 min)Part 5 - Gas station modeling (15 min)Part 6 - Creating lighting and shadows (15 min)Part 7 - UV Project modifier (6 min)Part 8 - Color matching (5 min)Part 9 - Improving textures (6 min)Part 10 - Creating reflections on the ground (12 min)Part 11 - Adding details (9 min)Part 12 - Overlays (11 min)Part 13 - Post-processing - Part 1 (9 min)Part 14 - Post-processing - Part 2 (12 min
Overview
Section 1: Introduction
Lecture 1 Tutorial introduction
Lecture 2 Inspiration and preparation
Lecture 3 F-spy
Lecture 4 Blender, camera, and character import
Lecture 5 Combining background image and render
Lecture 6 Gas station modeling
Lecture 7 Creating lighting and shadows
Lecture 8 UV Project modifier
Lecture 9 Color matching
Lecture 10 Improving textures
Lecture 11 Creating reflections on the ground
Lecture 12 Adding details
Lecture 13 Overlays
Lecture 14 Post-processing - Part 1
Lecture 15 Post-processing - Part 2
For blender beginners as well as more advanced users.