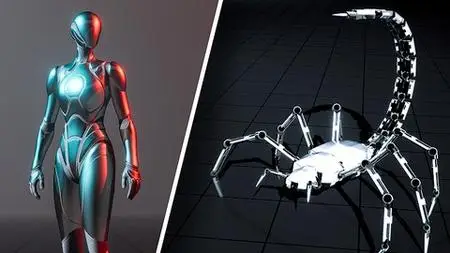
Control Rig For Unreal Engine 5
Published 3/2024
MP4 | Video: h264, 1920x1080 | Audio: AAC, 44.1 KHz
Language: English | Size: 7.85 GB | Duration: 7h 16m
Published 3/2024
MP4 | Video: h264, 1920x1080 | Audio: AAC, 44.1 KHz
Language: English | Size: 7.85 GB | Duration: 7h 16m
Learn Control Rig within Unreal Engine 5 to create procedural animation systems.
What you'll learn
Learn the fundamentals of ControlRig for Unreal Engine 5
Create a procedural walk animation system
Create a procedural turn-in-place animation system
Learn various techniques to add dynamic motion to your character animations
Master ControlRig functions, variables and logic, and how to incorporate it into your project
Learn problem solving and debugging
Learn how to turn your idea from a concept into a working system
Gain an expert understanding of ControlRig's capabilities for use in your single & multiplayer games, videos and animations, UEFN projects and more
Requirements
No Unreal Engine skills or animation skills are required. This course takes you through every step, starting very slowly and gradually increasing in complexity until you fully master ControlRig for procedural and dynamic animations.
Description
In this course you will learn to use Control Rig in Unreal Engine 5, with a focus on creating procedural animation systems.This course is suitable for complete beginners, all the way through to professional animators and experienced game developers. It begins very slowly with detailed explanations and instructions to take you through creating procedural animation systems, which gives us a chance to explore and become familiar with various features of Control Rig.After creating a procedural walk system, we take a general look at some useful features of Control Rig, and experiment with systems that allow you to create characters that interact with the environment and move realistically.And finally we will create a procedural turn in place animation system, including troubleshooting, tweaking, and working through the logic step by step.The project file includes the completed versions of everything we create for Unreal Engine 5.2 and 5.3. This will be updated to include a 5.4 version when that version of the engine releases.The techniques and methods explored are suitable for single player and multiplayer projects. The techniques used within Control Rig are also suitable for UEFN. This applies to the fully procedural sections and the specific functionalities we explore inside of Control Rig (at the time of writing animBP access is not available in UEFN, preventing a combination with keyframed animation - but the majority of the concepts will still work).This information in this course is not available elsewhere, and is the result of many years of experimentation with Control Rig and procedural animation systems. My goal was to condense all of my experience with Control Rig into an easily digestible and understandable course, with explanations and diagrams at every step, so that you can learn a full mastery of how to use Control Rig for your own procedural and dynamic animations.I look forward to seeing you on the course, and for you to share your creations and ideas. I'm always available for a discussion of concepts/ideas/help with any project, even if your specific use-case isn't covered directly in this course.
Overview
Section 1: Introduction
Lecture 1 Introduction and overview
Lecture 2 Basic tips & troubleshooting
Section 2: Creating a Procedural Walk Cycle
Lecture 3 Initial Character Blueprint setup
Lecture 4 Initial Animation Blueprint setup
Lecture 5 Creating the ControlRig class
Lecture 6 Make ControlRig DO something
Lecture 7 Create an array of FootNames
Lecture 8 WorldSpace vs RigSpace explanation
Lecture 9 Save the default foot transforms to a new array
Lecture 10 Visualize the foot transforms with DrawTransform
Lecture 11 FullBodyIK node explanation
Lecture 12 Add one leg into the solver
Lecture 13 Add the rest of the legs into the solver
Lecture 14 SAVE FIRST! Collapse to a function
Lecture 15 Convert World transform to Rigspace transforms into the solver
Lecture 16 Explanation of how we will calculate the velocity
Lecture 17 Create the CalculateVelocity function
Lecture 18 Calculate how far the character has moved in the world
Lecture 19 Calculate how far the character moves per second and draw it
Lecture 20 Smooth the calculated velocity
Lecture 21 Add comments to the calculate velocity function
Lecture 22 Cycle explanation
Lecture 23 Creating the CalculateCycle function
Lecture 24 Test our cycle with a print node
Lecture 25 Creating the MoveFeetTransforms function
Lecture 26 Creating a FootLocked array of booleans
Lecture 27 Is the foot locked or unlocked logic
Lecture 28 Create the Swing Percent and unlock condition
Lecture 29 Unlocked logic and lock condition
Lecture 30 Include and test the MoveFeetTransforms function
Lecture 31 Making the unlocked foot snap back to the default pose position
Lecture 32 Creating the foot timing offset array
Lecture 33 Creating the PerFootCycle array
Lecture 34 Using the PerFootCycle instead of Master Cycle
Lecture 35 A basic interpolation for the swing phase
Lecture 36 Creating the foot prediction function
Lecture 37 Projecting the landing spot forward in the direction of velocity
Lecture 38 Scale the prediction time based on how long until the foot lands
Lecture 39 Change cycle speed based on the characters movement speed
Lecture 40 Creating the stride length variable, and calculating the cycle time in seconds
Lecture 41 Save the foot lift-off spot to a WorldLockedFootTransforms array
Lecture 42 Accurate interpolation between the lift-off to the landing spot, based on cycle
Lecture 43 Make the legs lift in an arc using a custom curve
Lecture 44 Make the lift height based on the movement speed
Lecture 45 Overview of the plan for foot traces
Lecture 46 A basic trace for every landing spot
Lecture 47 Random body motions and general improvements
Lecture 48 More advanced traces explanation and testing on a landscape
Lecture 49 Implementing more advanced traces
Section 3: Porting control rig to another character
Lecture 50 Porting the procedural animation system to another character
Lecture 51 Changing variables for the new character
Section 4: Various ControlRig features and tips for procedural animation
Lecture 52 Using controls to move the character
Lecture 53 FullBodyIK settings, and interpolating control targets
Lecture 54 Value Over Time to delay movements
Lecture 55 BasicIK node instead of FullBodyIK, when, where, how
Lecture 56 Finding the Primary and Secondary axis
Lecture 57 Automatically compute the pole vector
Lecture 58 Make a bone point in a specific direction
Lecture 59 Aim more bones at a target with various weighting and interpolation settings
Lecture 60 Randomize the target point
Lecture 61 Simulate character breathing with chest scale
Lecture 62 Combine with an idle animation and create a character class
Lecture 63 Make the character target a position in the actual game level
Lecture 64 Creating functions that can be used in any other ControlRig
Lecture 65 Create the RotateAroundPoint function, to rotate in RigSpace
Lecture 66 Incorporate the translation change when rotating around a point
Lecture 67 Create a function to rotate a single bone in place, in RigSpace
Section 5: Turn-in-place animation system
Lecture 68 The challenge, the goal, and the starting point
Lecture 69 Saving the accumulated rotation
Lecture 70 Negate any rotation of the character to keep the same world rotation
Lecture 71 Make the spine always look in the correct direction
Lecture 72 Adding the solver and starting a rotation timer
Lecture 73 Compensate for pieces of the total rotation offset
Lecture 74 Applying the calculations to see the result on the character
Lecture 75 Offset the rotation timing of each foot
Lecture 76 Searching for issues and the next steps to improve
Lecture 77 Problem solving
Lecture 78 Weight shift towards the grounded leg
Lecture 79 Make the movement more natural and bouncy
Lecture 80 Bug fixing, finalizing, and looking to the future
Game developers looking to add procedural animations to their project.,Animators who want to make their animations more dynamic and interactive.,Anyone who is curious about procedural techniques and the future of real-time animation


