

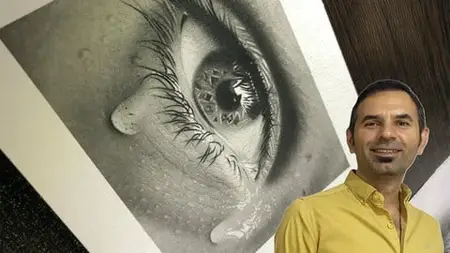
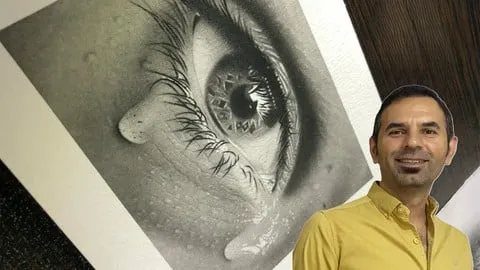
Drawing Hyperrealistic Eyes: The Ultimate Guide-Step-By-Step
Drawing Hyperrealistic Eyes: The Ultimate Guide-Step-By-Step
Last updated 8/2025
MP4 | Video: h264, 1920x1080 | Audio: AAC, 44.1 KHz
Language: English | Size: 10.21 GB | Duration: 7h 18m
Last updated 8/2025
MP4 | Video: h264, 1920x1080 | Audio: AAC, 44.1 KHz
Language: English | Size: 10.21 GB | Duration: 7h 18m
Learn to transfer images, shade skin, and render every wrinkle, pore, and tear with advanced tools.
What you'll learn
How to transfer reference images quickly and accurately using the image transfer method
The correct way to use advanced tools as you discover them, not just what they are
Step-by-step techniques for rendering ultra-detailed iris textures and patterns
My two-step method for layering natural-looking eyelashes with precision
How to draw hyper realistic teardrops to add emotional impact and visual complexity
How to shade eyelids and skin using brushes and graphite powder for lifelike depth
Techniques for drawing hyper realistic skin details—wrinkles, pores, freckles, bumps, and moles
Which types of erasers to use and when—for highlights, textures, and fine details
How to customize and build unique drawing tools you can’t buy in stores
Additional PDF Resources: Visual Summaries of Key Tips and Techniques
Requirements
It's highly recommended that beginners start with my "Realistic Drawing for Beginners" course. However, it's not a strict requirement, and you are welcome to jump directly into this course if you prefer.
A passion for learning and a willingness to practice.
Advance drawing supplies, which will be discussed in detail at the beginning of the course.
Description
• Note: This is a full, real-time course. You'll see every single stroke from start to finish with no time-lapses or skipped steps.• Have you completed my beginner’s course and feel ready to take your skills to the next level?• Are you passionate about hyperrealism and eager to master the finest details of the human eye?• Do you want to learn new tools, new techniques, and even how to customize your own equipment?In this advanced course, I’ll walk you through the complete process of drawing a hyperrealistic eye with the highest precision. To get the most out of this course, I recommend completing my Beginner Drawing Course first.We’ll start with a powerful time-saving method: image transfer—a practical technique that helps you set up your drawing quickly and accurately.Then, step by step, I’ll introduce new tools as we progress, always showing you how to use each one properly, not just what it is.You’ll learn how to carefully render every detail of the iris, followed by the eyelids and the textured skin around the eye.In this course, we primarily use brushes and graphite powder for shading, and I’ll teach you exactly how to work with each brush for different effects.We’ll focus on subtle skin features—like pores, bumps, moles, and shadows—to give your artwork a true sense of depth.You’ll learn my two-step technique for drawing eyelashes, and we’ll also tackle a challenging but beautiful element: drawing two realistic teardrops.Importantly, you’ll learn which type of eraser is best for which purpose.In fact, we’ll even create a few custom tools that you won’t find in any store. Sometimes we’ll modify existing tools to better suit the demands of hyperrealism.I’ve also gathered and written down all the important tips I mention in the videos into several PDF files—each one paired with relevant images—and I’ll be giving those to you as part of the course.Headlines:• Image Transfer Method: A fast and accurate way to start your drawing• Tool Introduction & Usage: Discover new tools and how to use each one effectively• Detailed Iris Rendering: Learn to capture complex patterns and textures• Lid & Skin Texture: Shade using brushes and graphite powder for ultra-realistic results• Drawing Skin Features: Bumps, freckles, wrinkles, and moles in full detail• Two-Step Eyelash Drawing: My proven method for layering lashes naturally• Drawing Teardrops: A subtle challenge that adds powerful emotion to your work• Custom Tools: Build and adjust tools to meet the needs of your artworkThis is a complete, real-time advanced drawing course. Every step is fully recorded—nothing is skipped or fast-forwarded. You'll see the entire process of creating a hyperrealistic eye, from the first line to the final details.Enroll now and take your drawing to a whole new level!
Overview
Section 1: Getting Started: Transferring Your Drawing & Essential Tools
Lecture 1 Advance Tools
Lecture 2 How to Transfer Your Drawing: 3 Quick and Accurate Methods
Lecture 3 The Best Transfer Method: Fast, Simple & Accurate
Lecture 4 Start to Transfer Your Drawing: Tips & Tricks
Lecture 5 How to Tape Down All 4 Sides of Your Drawing
Lecture 6 Transferring
Section 2: Drawing the Pupil & Iris: Creating Intricate Details
Lecture 7 Starting with the Pupil: How to Use Powdered Graphite
Lecture 8 Introduction to the Make up Brush
Lecture 9 Drawing Shadows: A Guide to Shading with a Brush Without Creating Stains
Lecture 10 Creating Complex Patterns Within the Iris
Lecture 11 Creating a Wedge Brush with Sandpaper
Lecture 12 The Mono Zero Eraser: Creating Highlights in the Iris
Lecture 13 What brush size should we use
Lecture 14 How to shading with brush
Lecture 15 The order of shading
Lecture 16 Wedge Brush
Section 3: The First Eyelash Layer, Eyelid Shading, & Making a Paper Cone
Lecture 17 The First Eyelash Layer & How to Make a Paper Cone
Lecture 18 Starting to Shade the Skin Above the Eye
Lecture 19 Applying the Second Layer of Eyelid Shade
Lecture 20 Finalizing the Eyelid with Brush and Pencil
Lecture 21 A handmade paper cone
Lecture 22 The order of drawing the eyelashes
Section 4: Applying the First & Second Shading Layers Under the Eye
Lecture 23 Subtle Shading for the White of the Eye
Lecture 24 Starting to Shade Under the Eye
Lecture 25 Applying the Second Layer of Shade to the Undereye Skin
Section 5: Eyelid Highlights & Skin Texture: Kneaded & Pencil Erasers
Lecture 26 Highlighting the Eyelid with the Wedge Brush & Mono Zero Eraser
Lecture 27 Creating Skin Texture with the Kneaded Eraser & Fine Hairs with the Mono Zero
Lecture 28 Introducing the Electric Eraser & Creating Moles with a Blending Stump
Lecture 29 The Mono Zero Eraser
Lecture 30 The pencil eraser and the kneaded eraser
Lecture 31 An electric eraser
Section 6: The Second Layer of Upper & Lower Eyelashes
Lecture 32 Applying the Second Layer of the Upper Eyelashes
Lecture 33 Applying the Second Layer of the Lower Eyelashes
Lecture 34 Continuing the Previous Step: Completing the Lower Lashes
Lecture 35 Drawing Wrinkles on the Undereye Skin
Lecture 36 Filbert brushes
Section 7: Drawing Both Teardrops with Pencil & Electric Erasers
Lecture 37 The First Teardrop: How to Draw It
Lecture 38 Drawing the Second Teardrop with the Electric Eraser
Section 8: Creating Undereye Skin Texture with Erasers & a Paper Cone
Lecture 39 Texturing Skin with a Pencil Eraser & Paper Cone
Lecture 40 Finishing Skin Texture with a Kneaded Eraser
Lecture 41 How to Safely Remove the Tape & Finish Your Drawing
Artists who want to add a new level of detail to their work. If you're ready to move beyond basic sketching and into creating incredibly lifelike textures, this course will show you how.,Intermediate artists struggling with realism. If you know the basics of drawing but have a hard time making your work look truly real, the step-by-step techniques for rendering skin, iris, and other details will help you master realism.,Beginners with a passion for detail. Even if you're new to drawing, you'll benefit from the clear, guided process for transferring images and using tools correctly from the start.