Engineering Drawing Part Ii
Last updated 7/2023
MP4 | Video: h264, 1920x1080 | Audio: AAC, 44.1 KHz
Language: English | Size: 7.74 GB | Duration: 8h 3m
Last updated 7/2023
MP4 | Video: h264, 1920x1080 | Audio: AAC, 44.1 KHz
Language: English | Size: 7.74 GB | Duration: 8h 3m
"Mastering Engineering Drawing & Graphics: Projection of Lines, Planes and Solids"
What you'll learn
After the end of this course, you guys will be able to interpret & comprehend technical drawings from the perspective of an Engineer.
Your imagination power will be elevated to a different level as you will be able to perceive object's orientation and prepare its Orthographic Projections.
Understand the Projection and Traces of Lines
Understand the Projection of Plane via both Change of Position Method and Auxiliary Plane Method.
Learn Projection of Solids
Requirements
Proper knowledge of Projection and its application to Point.
It would be beneficial if you also enroll to the preceding course "Master Engineering Drawing Part I"
Fundamentals of Geometry as in using compass, protractor to make two dimensional shapes.
Set of Pencils (H,2H,3H and 4H), a Mini drafter, protractor, compass or a rounder and good number of drawing sheets is all you need.
Well Patience, Hard Work and hunger towards learning is what i expect the most from you all.
Description
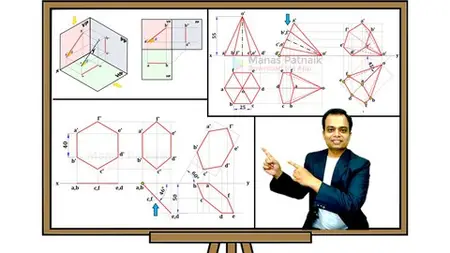
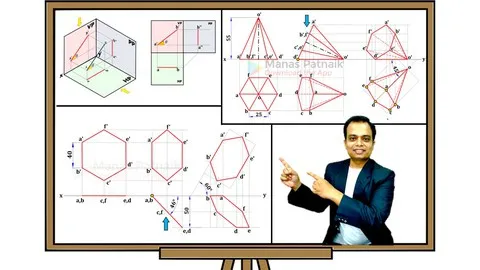
This course is all about learning the elements of Technical / Engineering Drawing. A picture is worth a thousand words and an animation is worth a thousand pictures. And by the end of this course you will realize how easy it gets to learn stuff from animations. This is not merely a subject to consume, but it's a language which allows engineers across various disciplines to communicate. This course is relevant across all disciplines of Engineering be it Mechanical, Civil, Electrical or Computer Science. This is a mandatory first year course in most of the universities globally. In Part II of Engineering Drawing, we will be covering the following topics in depth:1. Projection of Lines: In orthographic projection, lines are projected perpendicular to the projection plane, resulting in a series of two-dimensional views that provide different perspectives of the object. These views include front view, top view, right-side view, and other sectional views, depending on the complexity and requirements of the object being represented.2. Traces of Lines: This is an advanced topic where line end points are extended to meet at a point on Principal Plane. A horizontal trace is a point where the line meets the Horizontal Plane. A Vertical trace is a point where the line meets the Vertical Plane. 3. Projection of Planes: Projection of planes involves visualizing and communicating the spatial relationships and features of flat surfaces in a two-dimensional drawing. It plays a vital role in accurately representing objects and conveying critical information in engineering drawings.4. Auxiliary Planes (Shortcut to Orthographic Projections): This is an alternative to the traditional Change of Position Method. Here instead of changing the position of object, Auxiliary Planes are set up and the corresponding Top View and Front Views are projected directly onto it. With a little practice and intuition, you can master this projection technique.5. Projection of Solids: Projection of solids is a fundamental aspect of engineering drawing, enabling the accurate representation of three-dimensional objects on a two-dimensional plane. We are mostly going to be dealing with standard 3D shapes line Polyhedra (Prism, Pyramids) and Solids of Revolution (Cone and Cylinder)
Overview
Section 1: Projection of Line
Lecture 1 Introduction to Lines
Lecture 2 Case I– Line parallel to both HP and VP
Lecture 3 Case II– Line perpendicular to HP and parallel to VP
Lecture 4 Case III – Line perpendicular to VP and parallel to HP
Lecture 5 Case IV – Line inclined to HP and parallel to VP
Lecture 6 Case V – Line inclined to VP and parallel to HP
Lecture 7 Advanced Problems from Case 1 to Case 5
Lecture 8 Understanding the projection of Line inclined to both HP and VP
Lecture 9 Case 6_Example 1
Lecture 10 Case 6_Example 2
Lecture 11 Case 6_Example 3
Lecture 12 Case 6_Example 4
Lecture 13 Case 6_Example 5
Lecture 14 Application of Lines_Example 1
Lecture 15 Application of Lines_Example 2
Lecture 16 Application of Lines_Example 3
Lecture 17 Application of Lines_Example 4
Section 2: Traces of Line
Lecture 18 Understanding Trace of Line
Lecture 19 Example 1
Lecture 20 Example 2
Lecture 21 Example 3
Section 3: Projection of Plane
Lecture 22 Introduction to Plane and their Projections
Lecture 23 Standard Procedure for Projection of Plane
Lecture 24 Understanding Traces of a Plane
Lecture 25 Example 1
Lecture 26 Example 2
Lecture 27 Example 3
Lecture 28 Example 4
Lecture 29 Example 5
Lecture 30 Example 6
Lecture 31 Example 7
Lecture 32 Example 8
Section 4: Auxilliary Planes and their application in Orthographic Projection
Lecture 33 Idea and Concept of Auxilliary Planes
Lecture 34 Projection of Planes via Auxiliary Plane Method_Problem 1
Lecture 35 Projection of Planes via Auxiliary Plane Method_Problem 2
Lecture 36 Projection of Lines via Auxiliary Plane Method_Problem 1
Lecture 37 Projection of Solids via Auxiliary Plane Method_Problem 1
Lecture 38 Projection of Solids via Auxiliary Plane Method_Problem 2
Section 5: Projection on Solids
Lecture 39 Classification of Solids
Lecture 40 Learning Standard Procedure for Projection of Solids
Lecture 41 Example 1 on Cylinder
Lecture 42 Example 2 on Pentagonal Prism
Lecture 43 Example 3 on Hexagonal Pyramid
Lecture 44 Example 4 on Square Prism
Lecture 45 Example 5 on Square Pyramid
Lecture 46 Example 6 on Pentagonal Pyramid
Students who are about to enter into their First Year of Bachelor of Engineering regardless of their branch.,This course will also prove beneficial for school going students who have opted for Engineering Graphics or Engineering Drawing in their 11th and 12th Grade.,Students of Diploma and Polytechnic can also enroll in this course as Engineering Drawing is a mandatory subject.


