

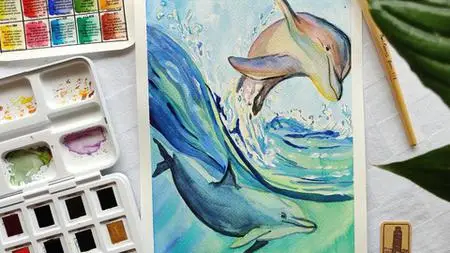
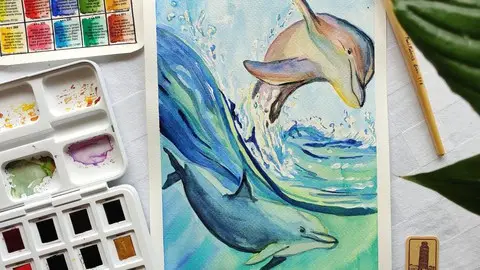
Learn To Paint Dolphins In Watercolours. Seascape
Learn To Paint Dolphins In Watercolours. Seascape
Published 11/2022
MP4 | Video: h264, 1280x720 | Audio: AAC, 44.1 KHz
Language: English | Size: 1.84 GB | Duration: 1h 27m
Published 11/2022
MP4 | Video: h264, 1280x720 | Audio: AAC, 44.1 KHz
Language: English | Size: 1.84 GB | Duration: 1h 27m
Learn to paint beautiful seascape with drops of water
What you'll learn
how to draw the dolphins in pencil
how to apply reserving fluid
how to work with wet-on-wet technique
how to work with wet-on-wet technique
learn how the highlight of dolphins work under the water and above water
Requirements
the course is perfect for intermediate level, but beginners can give it a try as I guide through the whole process
watercolour paper 200 gsm or more
watercolour paints, I use 36 White nights pans, you can use your pallette
watercolour paintbrushes (flat for washing the paper, big round for the base, thin round brush for details)
tissues
hairdryer
washi tape
plain water
Description
This course is about learning 2 main techniques in watercolours. You will learn how to draw dolphins, how to use fluid mask and then how paint water, and dolphins in the movement.During this class you will learn:- how to draw the dolphins in pencil - this step is important as it will guide you throughout the whole process from applying fluid mask, till painting water and dolphins- how to apply the masking fluid, and why we use it in our works - Reserving fluid is a kind of rubber glue that can be used to cover individual parts of the paper. This layer will keep the surface free of paint, even if you paint with a lot of water. Masking fluid can be used when you need a clear boundary between the background and elements on it, or when you need to place small light details on a dark or colored background.Since the masking fluid resembles a rubber glue in its texture, it sticks together the pile. I advise you to moisten the brush before starting work and run it several times over the bar of soap so that it forms a protective layer. After that, you can safely get to work! Remember to rinse your brush with warm water immediately after use. Another important point! Make sure your masking fluid is completely dry before you paint over watercolors. However, it is necessary to remove its layer only after the watercolor is completely dry.- how to apply the first washes with wet-on-wet technique - The “wet” technique, as a rule, involves working in one session, and if you work for several days, then each time you need to wet the sheet again. Glazing allows you to continue painting with watercolors without preparatory work.- how to work on details with wet-on-dry technique to catch up the viewer eyes - Glazing allows you to make the colors deeper, as the watercolor lightens by several tones when it dries. It is important to remember that a new layer of paint should be applied only after the previous one has completely dried. Glazing makes the image more realistic due to the ability to work out the nuances of lighting and volume transfer.For the drawing you will need a pencil with the hardness B or HB, and a kneadable art eraser. Try not to leave strong lines, as water and watercolours work as fixative, and will be difficult to erase the lines after you will paint.In watercolours, if you do not have all 36 pans, use the colours you have. If you use any other blue colours as I mention, do not worry about. Try to experiment and follow along the techniques.1. First step is about the drawing. You will have to draw both dolphins and drops of water.2. Then you will apply reserving fluid. It will help you to preserve the white spaces on the paper. Specifically for the drops in water3. You will wet the work and will have to create the base colour quick, as only working quick you will get beautiful transitions of blue colour.4. Once the work is dried, you will intensify the work with colour, as wet-on-wet technique leaves a lighter colour of watercolour once it dries.5. You will have to remove the fluid mask and to start working on dolphins. Both dolphins are grey in nature, but because one of those is under water, there will be more blue colours in its skin. The second one is above the water, and have natural light on the skin, what makes it more colourful and with warmer tones.6. Last, but not least, you will have to adjust the details. Details are important as those catch up the viewer eyes.Just use the steps I explain during the work and enjoy the process. Good luck!
Overview
Section 1: Introduction
Lecture 1 Introduction
Lecture 2 Supplies you will need in this course
Section 2: Drawing and painting process
Lecture 3 Drawing the dolphins and water
Lecture 4 How to apply reserving fluid
Lecture 5 First wash wet-on-wet technique
Lecture 6 Second wash, wet on dry, giving more intensity
Lecture 7 Working on first dolphin, wet on dry technique
Lecture 8 Working on the second dolphin, wet on dry technique
Section 3: Conclusion
Lecture 9 Last thoughts
For all the people who enjoy watercolours