Model And Texture A Radio Prop For Video Games Using 3Ds Max
Last updated 11/2014
MP4 | Video: h264, 1280x720 | Audio: AAC, 44.1 KHz
Language: English | Size: 2.99 GB | Duration: 8h 16m
Last updated 11/2014
MP4 | Video: h264, 1280x720 | Audio: AAC, 44.1 KHz
Language: English | Size: 2.99 GB | Duration: 8h 16m
Learn to create a high-poly clock asset in 3ds Max, and learn to create the final low poly and textures!
What you'll learn
Learn the complete pipeline for making a game asset with today's art standards in mind
Learn to model high poly and low poly game assets using 3ds Max
Learn UVW Unwrapping, Texturing, and rendering for game assets
Requirements
Autodesk 3ds Max
Adobe Photoshop or a similar image editing program
Description
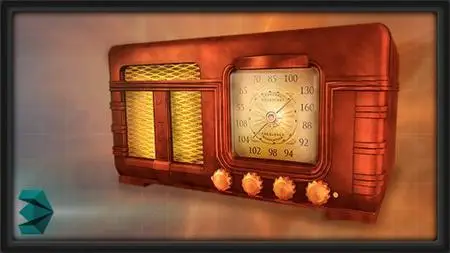
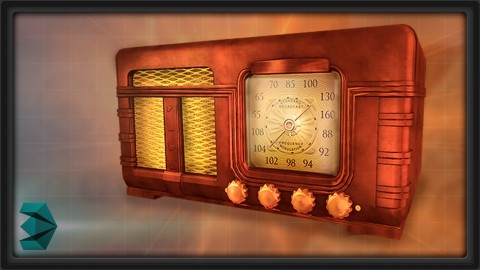
Learn the complete pipeline for creating a game asset from start to finish! In this course, we'll take a nostalgic dip into the past by recreating an authentic 1930's home radio. We'll begin by constructing our high polygon mesh (often called sub-d modeling), utilizing several methods to create the base mesh and accompanying finer details. Once that is complete, we'll use our original high poly as a base mesh to create our low poly mesh. We'll then UV unwrap the mesh to create clean UVs. We'll take the info from the High Poly model to render out our normal maps, and the UV layout will be used as the schematic for creating the texture in Photoshop. We'll complete the radio asset with finishing touches in the material, which should provide a complete "A-to-Z" foray into the 3D art creation pipeline. (Students - please look under Section 1 / Lecture 1 downloads for the source files associated with the lesson.) More about the Instructor: Stephen Wells is an expert 3D modeler for characters, props, vehicles, weapons and environments and have created both high and low polygon assets for game productions. He has over 20 years experience in creating a variety of game assets for several different genres (fantasy, sci-fi, combat, superheroes, horror, etc) using 3ds Max, Maya, Photoshop, ZBrush, Mudbox, Topogun, and XNormal. As an enthusiastic instructor, he loves creating video tutorials on a wide variety of subjects to help students better their skillsets.
Overview
Section 1: Blocking out the Mesh and Setting up the Scene
Lecture 1 Introduction
Lecture 2 Reference and Planning
Lecture 3 Setting Up Your Scene
Lecture 4 Modeling the Front Plate
Lecture 5 Modeling the Front Plate 02
Lecture 6 Modeling the Front Plate 03
Lecture 7 Modeling the Front Plate 04
Lecture 8 Modeling the Front Plate 05
Lecture 9 Modeling the Front Plate 06
Section 2: Modeling Grills, Rails, and Paneling
Lecture 10 Introduction
Lecture 11 Planning and Cleanup
Lecture 12 Modeling the Front Plate Symbols
Lecture 13 Modeling the Grill
Lecture 14 Modeling the Side Rails
Lecture 15 Modeling the Volume Knobs
Lecture 16 Modeling the Side Panels
Lecture 17 Modeling the Base
Section 3: Modeling Dials, Letters, and Numbers
Lecture 18 Introduction
Lecture 19 Modeling the Back 01
Lecture 20 Modeling the Back 02
Lecture 21 Modeling the Center Dial
Lecture 22 Modeling the Center Dial Back Plate
Lecture 23 Modeling the Lettering 01
Lecture 24 Modeling the Lettering 02
Lecture 25 Modeling the Numbers and Scuff Pads
Section 4: Adding Edge Loops and Final Details, Building the Low, and UVW Unwrapping
Lecture 26 Introduction
Lecture 27 Adding Edge Loops 01
Lecture 28 Adding Edge Loops 02
Lecture 29 Adding Final Details 01
Lecture 30 Adding Final Details 02
Lecture 31 Creating the Low Poly Mesh
Lecture 32 UVW Unwrapping
Lecture 33 UV Layout
Lecture 34 Baking Normal and AO Maps
Section 5: Texturing and Final Presentation
Lecture 35 Introduction
Lecture 36 Adding Base Colors in Photoshop
Lecture 37 Coloring the Peripherals
Lecture 38 Adding the Fine Details
Lecture 39 Finishing Touches
Beginners to game asset modeling,Anyone interested in learning the basics of 3d modeling for games or film


