Model And Texture A Stylized Dungeon For Games
Last updated 9/2016
MP4 | Video: h264, 1280x720 | Audio: AAC, 44.1 KHz
Language: English | Size: 1.16 GB | Duration: 6h 41m
Last updated 9/2016
MP4 | Video: h264, 1280x720 | Audio: AAC, 44.1 KHz
Language: English | Size: 1.16 GB | Duration: 6h 41m
Learn the skills to create amazing models and textures to build a stylized environment from start to finish!
What you'll learn
Model and sculpt stylized assets for games
Define and paint stylized materials like metal, stone, and wood
Sculpt and bake normal maps from a high poly asset down to a low poly object
Create Tileable textures using ZBrush and Photoshop
Requirements
Any recent version of Maya or 3ds Max (The course uses Maya LT, but a modern 3d modeling app and an understanding is needed)
Any recent version of Photoshop (CC is used in the course)
ZBrush 4R7, or any version that includes Dynamesh
3DCoat
Marmoset
Description
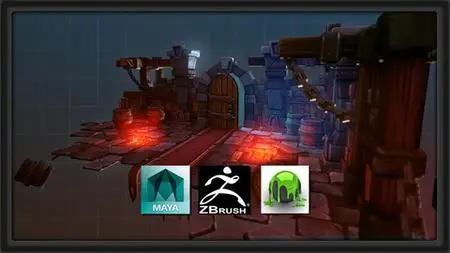
In this course we will be going through the process of creating a small stylized dungeon environment from the blockout stage to the final presentation. I will be guiding you through the process of modeling the low poly assets and show you different techniques of UVing. We will then take our assets into ZBrush where I will be showing how to define all the materials that you will find in this environment. We will use some of the ZBrush sculpts to render tiling texture flats that we can composite in Photoshop. I will then be guiding you through the process of painting the textures for a few assets so you can reproduce this process for the remaining models. Finally, we are going to set up a scene in Marmoset for the final presentation. By the end of this course, you should be able to create and understand the workflow that I use to create stylized environments like this one.(Students - please look under Section 1 / Lecture 1 downloads for the source files associated with the lesson.)
More about the Instructor:
Tobias Koepp is an accomplished environment artist in the games industry. He started his career as a student in the Netherlands where he had the chance to work as an intern at Guerilla Games for about half a year. He is now currently working on his first full-time job as a 3D artist at an outsourcing studio in Spain. I’ve always been fascinated by hand painted and stylized art and work hard to turn this passion into a job.
Overview
Section 1: Blocking out and Modeling the Objects for our Scene
Lecture 1 Download Course Files Here!
Lecture 2 Introduction to the course
Lecture 3 Preparing our Maya Scene
Lecture 4 Blockout in Maya
Lecture 5 Modeling the Pillar
Lecture 6 Modeling the Door
Lecture 7 Refining the Door Model
Lecture 8 Modeling the Walls
Lecture 9 Modeling the Props
Section 2: Uving and Sculpting our Details
Lecture 10 Introduction to UVs and Sculpting
Lecture 11 UVing the Pillar
Lecture 12 UVing the Door
Lecture 13 Refining the Door UVs
Lecture 14 Tiling Textures Preparation
Lecture 15 Sculpting the Pillar
Lecture 16 Sculpting the Pillar (Continued)
Lecture 17 Refining the Pillar Details
Lecture 18 Wrapping up the Pillar Sculpt
Lecture 19 Sculpting the Door
Lecture 20 Finishing the Pillar and Sculpt Wrapup
Lecture 21 Sculpting a Tiling Texture
Section 3: Baking Normal maps and AO for our Sculpts, and Starting our Painting
Lecture 22 Introduction to Baking and Painting
Lecture 23 Baking the Pillar
Lecture 24 Baking the Door
Lecture 25 Baking the Tileable Texture
Lecture 26 Tiling Texture Compositing
Lecture 27 Tiling Texture Coloring
Lecture 28 Tiling Texture Wood Example
Lecture 29 Pillar Paint Preparation
Lecture 30 Painting the Pillar
Lecture 31 Wrapping up the Pillar Paint
Section 4: Painting the Door, and Compositing our Scene in Maya
Lecture 32 Introduction to Wrapup Overview and Scene Composition
Lecture 33 Painting the Door
Lecture 34 Refining the Door
Lecture 35 Painting Door Details
Lecture 36 Door Paint Wrapup
Lecture 37 Rebuilding the Scene in Maya
Lecture 38 Final Composition in Maya
Lecture 39 Rendering in Marmoset
Lecture 40 Finalized Rendering, Composition, and Course Conclusion
Lecture 41 Bonus Lecture: Further Learning with 3dmotive
This course is for students that have a basic understanding of modeling, sculpting, and texturing that want to bring their stylized workflow to the next level. It’s also meant for those who have only purely painted their textures without using any normal map baking and will introduce this to their workflow.,This course is not for people who expect a realistic-styled approach to the creation of an environment, as this will not be covered in this course.


