


Sparkly 3D Lettering in Procreate with Supplied Brushes and Bonus Procreate Mockup
Sparkly 3D Lettering in Procreate with Supplied Brushes and Bonus Procreate Mockup
Duration: 56m | .MP4 1280x720, 30 fps(r) | AAC, 48000 Hz, 2ch | 694 MB
Genre: eLearning | Language: English
Duration: 56m | .MP4 1280x720, 30 fps(r) | AAC, 48000 Hz, 2ch | 694 MB
Genre: eLearning | Language: English
I love the way Procreate helps to create sparkle and shine! The Luminance category of built-in Procreate brushes includes several amazing brushes. My personal favorites are the light flare and the Bokeh brush. Both can be used to add some great atmosphere to a piece. In this class, we will be working on typography. We will create a single word layout with lettering that we add shine to. We will also add some extreme depth using the Motion Blur. Confused? You won’t be once you see what can be done with the Motion Blur.
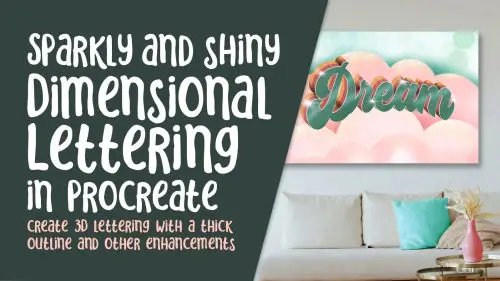
In this Sparkly 3D Lettering class, we will create an art piece as suitable for hanging on a wall as it is for use on printed materials like greeting or postcards. It can be adapted for so many things
In this class I’ll walk you through:
my step-by-step method for using Motion Blur to add extreme depth
tips for creating compositions and a simple but effective background
my workflow for use of layers and other great features like Gaussian Blur
adjusting with Hue and Saturation or with opacity
methods for keeping the art fully editable for later adjustments and re-coloring
If you’re an adventurer with a good basic knowledge of Procreate, you’ll be able to go through all the steps. This class will benefit anyone who wishes to create any sort of printed material, whether it be for wall art or for many other POD items.
The key concepts I will include:
review of my techniques for air brushing or use of Gaussian Blur to create subtle shadows and highlights
a look at layering and adding enhancements
approaches you can take for creating a series of art pieces
This is an quick class for you, even if you are not sure what you will use the layout for! Learning new Procreate productivity strategies is always fascinating. I assure you that you will create something special, and it’s so easy, once you get the hang of it!
Intro to Sparkly 3D Lettering in Procreate
This short intro will give you an overview of the class.
Lesson 1: Inspiration, Ideas and Overview
In this lesson, I will show you a bunch of inspiration which will lead us towards the end goal of creating interesting 3D lettering.
Lesson 2: Type Set Up and Adding Dimension
In this lesson, I will break down the complete process of setting your type. I show you a few adjustments and methods to curve the type. Lastly, I show you how to use Motion Blur to create the deep shadow.
Lesson 3: Additional Dimension and Enhancements
In this lesson, I show you how I create additional depth using a few different techniques. We double up on the colored area of dimension. I will add a tiny white line around the top layer of lettering. Next, we use Multiply and Add Blending modes to add variation in the tone of the main lettering.
Lesson 4: Drop-Shadow Highlights and Dimension
This is the lesson in which I teach you about adding the highlights and shadows that make our piece look shiny and metallic. We will discuss the different planes and I will explain the angle you need to work with.
Lesson 5: Adding Clouds and Background Bling
In this lesson, we will add all the shine! For now, we will focus on the background. I show you various ways to get additional depth.
Lesson 6: Twinkle and Light Flair Enhancements
At this stage, we pull our layout together, and I will add the small details that make it work. I use Luminance Procreate built-in brushes as stamps to add the light flares and luminance. I experiment with each of the brushes in this set. I will also show you a bunch of adjustments to enhance the layout.
Lesson 7: Closing Thoughts and Wrap Up
We will conclude everything in this lesson. I show you a couple of quick mock-ups with the design and we end with a chat about next steps.
Concepts covered:
Concepts covered include but are not limited to the use of Motion Blur, layering, transparency, Procreate brushes, Procreate sparkle, shine and luminosity, dimensionality using shadows and highlights, using add and multiply blend modes for tonal changes using the same color, brush settings, Procreate elliptical selection tool, the Brush Studio in Procreate, adjusting Procreate brushes, compositions, use of glitter, adding glitter texture with brushes, Procreate brushes for adding other interesting details, workflow best practices, painting best practice, Procreate composites, techniques with paints and blending, and much more.
You will get the bonus of…
56 minutes of direction from an instructor who has been in graphic design business and education for over 40 years
knowledge of multiple ways to solve each design challenge
an outline and a set of 10 brushes