


AE.TUTSPLUS - Video Tutorials for Adobe After Effects (Volume 11)
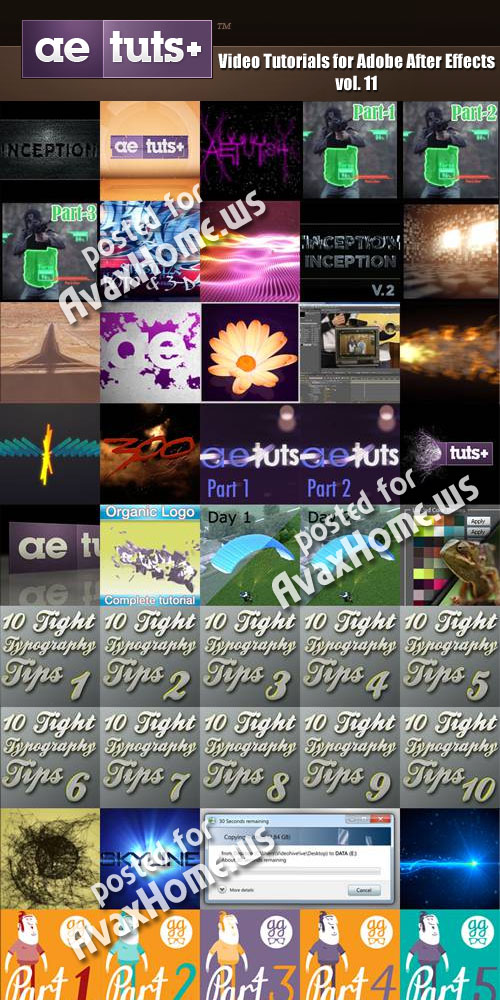
AE.TUTSPLUS - Video Tutorials for Adobe After Effects (Volume 11)
English | QuickTime (MOV) | 9.5 Hours | 7.54 Gb
Video: 1280x800, 30 frame/s | Audio: mp4a: 44100Hz 128 kb/s tot , stereo (2/0)
English | QuickTime (MOV) | 9.5 Hours | 7.54 Gb
Video: 1280x800, 30 frame/s | Audio: mp4a: 44100Hz 128 kb/s tot , stereo (2/0)
Aetuts+ is a site made to house and showcase some of the best After Effects tutorials around. We publish tutorials that not only produce great effects, but explain them in a friendly, approachable manner. We also stock up links to tutorials, articles, presets and plugins from around the web to help you get the most out of After Effects.
252. Aetuts+ Hollywood Movie Title Series – Inception v1
Continuing our Aetuts+ Hollywood Movie Title Series, today’s tutorial will explain how to make the “Inception” flying logo style, using Cinema 4D 11.5 and After Effects. In Cinema, we’ll be modeling a maze logo, then using Mograph module (Cinema 4D 11.5 v.), we add the buildings inside of the labyrinth scene. We’ll follow in After Effects putting together the final composition.
253. Invent Your Own Custom Logo Transformation Template
In this tutorial I will show how to create a logo transformation template that can be re-purposed and features the ability to drop in any logo and have the effect and shadows update automatically… similar to something you might see on Videohive. Then, to finish off we will build a simple 3d environment plus some additional scene elements.
254. Get Tangled Up In Twisted Wire Text
In this tutorial I will demonstrate a very simple way to trace text and then recreate it using multiple Trapcode Particular layers wobbling and shivering in 3D space. A very simple technique which results in a stunning look that could easily be modified into roots, veins, or any number of other ideas.
255. Fallout 3 V.A.T.S Shot – Day 1 of 3
Today we’ll go over setting up our scene and preparing it for keyframe animation. We’ll begin to build the elements of the V.A.T.S effect such as the outlines, grids, and percentage boxes.
256. Fallout 3 V.A.T.S Shot – Day 2 of 3
Today we’ll finish up building the percentage boxes, and the last few elements needed to complete the scene. We’ll get into the early stages of keyframe animation, and talk about the best way to get the animation to match the video game.
257. Fallout 3 V.A.T.S Shot – Day 3 of 3
Today we’ll finish the keyframe animation and final details. Color correction will breifly be covered as well.
258. All Rotoscoping Wants Is A Little Stability
In this tutorial we will be taking some necessary steps to stabilize our footage so we can then rotoscope the dumpster out with ease. After we roto we’ll employ some arithmetic so we can reverse the stabilized matte, add AE’s built in motion blur, and composite our 3D text in the background. To do this we’ll be attaching our camera to a similar stabilized area to fake 3D motion tracking. So let’s get to it.
259. A Beautiful Ripple Using Form’s Audio React
In this tutorial we’re gonna show you how you can create an abstract audio reactant background with Trapcode Form and we will discover the advantages of Audio React.
260. Aetuts+ Hollywood Movie Title Series – Inception v2
In this tutorial we’ll explain how to make the “Inception V2? flying logo style, using Cinema 4D v12 and After Effects. First, we’ll be modeling a logo fracture with Mograph. Then we’ll follow in After Effects compositing everything together with effects. For Premium Members, I’ve included the version of the Inception Inline font, with letters to compose the Inception logo. Cheers!!
261. Polishing Treatment To Save For After Effects
In this tutorial we’ll go over the multitude of ways we can take our 3D renders from any program and spice them up in After Effects. If you’re like a lot of artists, you try to get your renders out of your 3D programs as quickly as possible. We’ll be looking at color correction, adding lights, film grain, and a bunch of other fun finishing touches.
262. Don’t Get Stranded In A Wicked Heat Wave
In this tutorial, we’ll discuss an easy method for adding heat type distortion to an image using particles to drive the displacement rather than the more common method of Fractal Noise. Throw on some shorts and some sunblock… it’s gonna get hot in here!
263. Let Your Logo Bleed Through Like An Ink Spill
Hey everyone! Today I’m gonna show you how you can create a cool looking basic ink bleed logo reveal. You can use this method for a photo, logo, text or just as a simple transition…. It’s up to you.
264. Create a Beautifully Animated Faux 3D Flower Scene
Twice a month we revisit some of our reader’s favorite posts from back in the archives of Aetuts+. Today we’ll look at a tutorial originally published in March 2009 by Tan Wei Yan. Enjoy!
265. Endlessly Zoom Into Your Own Droste Effect
In this Basix tutorial, we’ll learn how to create the Droste Effect in Adobe After Effects. We’ll be be parenting our footage to precomps and scaling to give the illusion of an infinite zoom.
266. Put Out A Flamethrower Lookin’ Fire Using Particular
I think everyone has tried to create a realistic, organic flame at some point. Today, without using any difficult simulation software like Realflow or Maya Fluids, we’ll cover how to make a hot flame in AE using only Trapcode Particular!
267. Link Sound To Animation For A Unique Result
Today’s tutorial will show you how to link sound to your animation to create a cool abstract animation. We’ll be using Shape Layers with animators as well as some simple expression linking to create the animation. Hopefully it “looks” as easy as it “sounds”.
268. Aetuts+ Hollywood Movie Title Series – 300
Continuing our Aetuts+ Hollywood Movie Title Series, today’s tutorial will explain how to make the “300” flying logo style, using only After Effects, with a little support from Photoshop and Trapcode Shine “This is SPARTA!!!!”
269. Zaxwerks 3D Serpentine: Unlocking the Full Potential – Day 1
In case you’re not familiar, Zaxwerks 3d Serpentine allows you to create awesome 3D path extrusions right inside After Effects. Zaxwerks agreed to provide us an amazing 40% off discount code with this set of tutorials. It’ll expire soon so use it while you can!
270. Zaxwerks 3D Serpentine: Unlocking the Full Potential – Day 2
In case you’re not familiar, Zaxwerks 3d Serpentine allows you to create awesome 3D path extrusions right inside After Effects. Zaxwerks agreed to provide us an amazing 40% off discount code with this set of tutorials. It’ll expire soon so use it while you can!
271. Super Stringy Hair-Like Logo Reveal
In today’s tutorial we’ll be creating a neat string / wipe / peel effect which can be applied to all different kinds of media. It will cover the basics of setting up Trapcode Form, and using alpha channels to control its effect… allowing you to discover some pretty cool effects which can be easily manipulated to create all kinds of craziness.
272. Enhance Your Workflow: Use “Create3DShapes” To… Create 3d Shapes
In today’s tutorial, we’re gonna put together a fun little quick logo animation using the Create3DShapes Script over on aescripts.com. I’ll run you through the basics of how to set up the scene with lights, reflection, and a wide-angle lensed camera to enhance the feel of your project.
273. Organic Liquid Embossed Logo Reveal
In this tutorial you will learn how to create a beautiful, organic logo in After Effects, without any use of external plug-ins. You will understand how to split a layer in hundreds of smaller parts and animate those layers using expressions and a small number of keyframes, which will help you in terms of render time during your work. I will show you how you can transform any composition or layer into a 3d extruded one and how to be able to control that extrusion using expressions. Also we’ll learn some tricks and tips, some keyboard shortcuts, and the importance of keeping things well organized along the way. I hope you will find my tutorial interesting and useful!
274. Color Correction In After Effects With Color Finesse – Day 1
This tutorial is broken into two parts. In this first part we’ll cover the basic knowledge of how to do color correction and how to navigate the Color Finesse UI from within After Effects. Tomorrow we’ll be doing a bit more of a hands on tutorial walk-through of correcting a series of HD and SD images.
275. Color Correction In After Effects With Color Finesse – Day 2
This tutorial is a continuation of yesterday’s where we covered the basic knowledge of how to do color correction and how to navigate the Color Finesse UI from within After Effects. Today we’ll be doing a bit more of a hands on tutorial walk-through of correcting a series of HD and SD images.
276. Making Your Color Scheme a Whole Lot Kuler!
This tutorial was originally posted in October 2009 and we thought we’d jump back into the archives here for “Color Grading Week” to take a look at this handy script from Mathias Mohl.
277. Tight Typography Tips #1 – “Background Check”
I think there was a moment in each of our lives when we discovered the almighty “vignette”… You can always tell when a person first learns the technique by going through their facebook albums… Yep, there it is, the weekend I first started “using” and “abusing”. I can’t tell you how many beginner typography projects I’ve seen where the creator just ads a vignette and expects everything to be ok… now.. I’m not bashing the vignette. In fact, I still use if for the vast majority of my animation projects… but the principle here is to be discreet, really, unnoticeable… unless you want it noticed, but the idea of this step is to have a complimentary background to help your text along.
278. Tight Typography Tips #2 – “Size Over Scale”
When you go to fit multiple words in place like a big puzzle, there is the immediate temptation to reach for that “S” key to adjust how big the word is compared to it’s neighbors. After Effects is smart and even if you scale up 700%, it’s still going to maintain smooth edges since it’s generated text and therefore still in it’s vector state… however, I still would encourage you to practice altering the size of the font rather then scale… By comparison your end result will be essentially identical, but depending on your plans for the text later, it’ll save you a headache if you start to animate with your scale at starting at 100% rather than 700%.
279. Tight Typography Tips #3 – “Give Me Some Space & Stay In Line”
At the end of the day, there are many aspects of animation (and all video production for that matter) that really can’t be entirely taught… good composition is one of those areas that CAN be learned, but requires God-given talent and a lot of practice to perfect.
280. Tight Typography Tips #4 – “Choose Your Next Move Wisely”
In the book “Creating Motion Graphics” by Chris and Trish Meyer, Chapter 14 talks about the camera and they say it’s generally a good idea to animate your subject or animate your camera, but if possible, not both. This just helps you keep your sanity as the composition progresses and the movement gets more complex. The more values you have keyframed, the harder it’s gonna be to go back and altering things later.
281. Tight Typography Tips #5 – “I Like The Way You Move”
One of the biggest elements that will bump your animation from amateur to amazing is the movement. This is the ultimate yet simplest test of your abilities in the field of animation… how well you animate. We always know when we see a polished, professional piece. The goal is for your animations to feel natural and not be overly noticeable or distracting. I often refer to our Premium Tutorial about the “12 Basic Principles of Animation” as it has been quiet influential in my growth as an artist. I actually went out and bought the book this originated from just so I’d have my own copy.
282. Tight Typography Tips #6 – “Stay Consistent”
Personally, this is probably the most difficult tip for me to follow. I always start the project and begin formulating a style and theme, then as creativity takes over and I continue to experiment with what else I could include or “Oh, what would that look like…”, I find myself going down a creative rabbit trail. Next thing you know the project is done, but it looks like four different artists played “Tag, You’re up now!” with my comp. By this I mean that my last five seconds look nothing like my first five seconds.
283. Tight Typography Tips #7 – “Get Ready… Preset… Go!”
There is this idea that if you’re a true artist, you have to create everything from scratch… I think this is an over compensation for not wanting to be one of those guys who has Video Copilot projects filling up their demo reels… Truth is, it’s totally fine to use stock footage, tutorial concepts, and animation presets…. just make sure those things are swimming in a pool of your own original content and you’ll be fine.
284. Tight Typography Tips #8 – “Let’s Get Graphical… Graphical”
Like I said at the beginning of the week, every project is different so this tip will look very different for each project, and each person. Try to use more then just words if you can. This will stretch your creativity and may even require you to seek some outside help in creating elements, but will be worth it in the end. Look for words that have implied attributes or characteristics. These sort of words let you have fun and add little elements to help convey their meaning.
285. Tight Typography Tips #9 – “Breakin’ Up Is Hard To Do”
One little concept that many people overlook is that words with multiple syllables look better when they appear by syllable. I use the same technique almost every time to do this. Let’s take a look…
286. Tight Typography Tips #10 – “Livin’ In Style”
I’m not that great of a graphic designer, but I have some friends who are… sometimes this can be intimidating cause it’s hard to know what looks good and more importantly what looks really bad. After all your characters are in place, it’s not always easy to decide if your words “needs a little something”.
287. Create A Generative Identity Using Plexus
In this tutorial Satya Meka will walk through how to create a generative style text reveal using Plexus in After Effects. Enjoy!
288. Aetuts+ Hollywood Movie Title Series – Skyline
Continuing our Aetuts+ Hollywood Movie Title Series, today’s tutorial will explain how to make the “Skyline” flying logo style, using Cinema 4d, After Effects, Trapcode Form, Trapcode Shine, and Trapcode Starglow. “Don’t watch the light!”
289. Windows “Copy & Paste” Dialogue Box Recreation – Day 1
In this tutorial we are going to learn how to recreate a Windows 7 copying dialogue box completely inside After Effects using only build in tools. There are a lot of nifty little tricks we can do in AE without using 3rd party plug-ins to get a pretty impressive “Copy & Paste” of the real thing.
290. Windows “Copy & Paste” Dialogue Box Recreation – Day 2
In this tutorial we are going to learn how to recreate a Windows 7 copying dialogue box completely inside After Effects using only build in tools. There are a lot of nifty little tricks we can do in AE without using 3rd party plug-ins to get a pretty impressive “Copy & Paste” of the real thing.
291. “Breath Of Life” Series – Day 1
This series takes you through the creative process of creating animation. From the initial sketch, to final animation. In this installment I’ll be creating character artwork in illustrator, taking you through how we design for animation, then preparing the artwork for import to After Effects.
292. “Breath Of Life” Series – Day 2
This is the second part of a series to take you through the creative process of creating animation. From the initial sketch, to final animation.
293. “Breath Of Life” Series – Day 3
In this tutorial I’ll be starting the animation process, beginning with the character walk cycle. I’ll be showing you how to use the puppet tool with the character artwork, and guiding you through understanding the key principles of the walk cycle.
294. “Breath Of Life” Series – Day 4
In this 4th installment I’ll be looking at some of the more advanced animation techniques in After Effects. I’ll show you how to create a looping walk cycle; a useful trick to save you time and hassle, and also how to work with 3D layers and animating Masks.
295. “Breath Of Life” Series – Day 5
In this final part in the series, we’ll make the finishing touches to our animation whilst covering some of the more technical aspects of animating in After Effects. I’ll cover using the Camera Layer, creating and using Adjustment layers and animating logo text, along with a great new Expression.
296. Illuminate A Lovely Logo Light Reveal
Hey guys! In this tutorial we’re gonna show you how you can create a cool logo or text reveal with Trapcode Particular. This effect has endless possibilities, so I hope you enjoy the enjoy!
297. Aetuts+ Hollywood Movie Title Series – Jonah Hex
Continuing our Aetuts+ Hollywood Movie Title Series, today’s tutorial will explain how to make the Jonah Hex – style flying logo. In this tutorial using Cinema 4D, we will model and animate the logo. Then in After Effects, by using presets and expressions, we’ll insert sparks, explosions, dust, fire and much more.
298. Gnarly Numeric Logo Reveal
Hello everyone! Today We’re gonna create a really nice number transition with Trapcode Form. This effects is quite cool because you can easily modify or change the characters to words, symbols, or shape layers..It’s up to you!
299. Use Echo To Create A Motion Trail
In today’s Quick Tip I’m going to talk about how I created the intro animation for the 10 Tight Tips To Turn Out Terrific Typography series. We’ll look at layer styles first then move into the how to use the Echo plug-in to create a nice fading motion trail for your text.
300. 3D Product Box Display Animation – Day 1
In this 2-part tutorial we are going to learn a quick and easy way to create 3D boxes and cubes inside after effects. Then we are going to take a look at some smart techniques for lightning the scene as well as cool ideas how to link the lights to the object so it always stay perfectly lit. Tomorrow we’re going to take a look at creating a simple yet powerful camera rig and animate a couple of nice camera moves to create something like a product box promo.
301. 3D Product Box Display Animation – Day 2
In this 2-part tutorial we learned a quick and easy way to create 3D boxes and cubes inside after effects. Then we took a look at some smart techniques for lightning the scene as well as cool ideas how to link the lights to the object so it always stay perfectly lit. Today we’re going to take a look at creating a simple yet powerful camera rig and animate a couple of nice camera moves to create something like a product box promo.
302. How To Create A Timewarped Logo Reveal
In this tutorial we will only use built in AE plug-ins to achieve the final effect. We will learn how to divide a layer into numerous parts and then how to control the geometric aspects of those parts using the advanced features of Card Dance along with the Ease and Wizz script. We will use Timewarp to achieve slow-motion and we’ll also experiment with CC Vector Blur combined with several other effects to achieve a cool looking background.
303. How To Blow The Face Off A Zombie Pirate
Today’s tutorial will show you how to create a zombie headshot. We’ll start by first rotoscoping out the head using his makeup line as a guide. From there we’ll add some stock footage of a decapitated head to create the illusion of a hollow skull. Lastly, we’ll use blood stock footage to mask the transition to the headless result.
304. Soul Molecule Transitional Wipe
Hello everyone! Today We’re gonna create a really nice title opening with Trapcode Particular. Few days ago I saw this great promo by this talented gentleman named InlifeThrill and I thought this could be awesome as a tutorial so I tried to create a similar animation from scratch.This time we won’t use Optical flares but you can improve this effect with your own lens flare plugins or you can purchase the animation by InlifeThrill. Let’s get started!
305. Make An Awesome Retro Video Game Title
In this tutorial we will create an “awesome” 80?s title opener. This is created entirely within after effects with no external effects! We look at animating text with per-character 3D, the Radio Waves effect, creating interesting evolving backgrounds and advanced color correction techniques.
307. Shoot Off A 3D Plexus Particle Stream
The tutorial is on how to create a “pseudo” particle stream using Plexus. I say pseudo because it’s not really a particle stream, it just appears as one. The tools involved are Cinema 4d and After Effects with these 3rd party plugins: Plexus, Trapcode Particular and VCP Optical Flares although Particular and Optical Flares could be substituted with Particle World and any lens flare but I used particular and optical flares in the tut.
308. Capture A Digital Satellite Government Surveillance Shot
Today’s tutorial is stocked full of all sorts of handy quick helpers as we talk about how to pull off a shot similar to the satellite perspective shot from the movie The Crazies. We’re going to talk about how to capture the best “satellite” looking images and finish by creating a digital style treatment…. Don’t look up!
309. Aetuts+ Hollywood Movie Title Series – Legend Of The Guardians
Continuing our Aetuts+ Hollywood Movie Title Series, today’s tutorial will explain how to make the “Legend of the Guardians” flying logo style. In this tutorial using Cinema 4d, we will model beveled text and animate of the logo. Then in After Effects, we’ll complete our project with clouds, a lens flare, particles, and our final composite. Enjoy!
310. Design Your Own Broadcast Lower Thirds
In this tutorial we are going to focus mostly on the simple built in tools in After Effects to create a nice broadcast looking lower third design. You are going to see how can create awesome designs using masks, gradients, shadows and bevels and more.
311. Elemental Combat Series: Electric Hands
Use the “Advanced Lightning” effect to composite some electric arcs in your hand. Then using a blur to make the lightning glow, we’ll add some light to the scene and use an expression to have the light flicker.
312. Elemental Combat Series: Fireball
Learn to create a fireball from a couple fire elements and then composite it into a scene that has been stabilized and tracked. You can use the same fireball to help light the scene as well.
+BONUS
AE.TUTSPLUS - Video Tutorials for Adobe After Effects (Volume 1)
AE.TUTSPLUS - Video Tutorials for Adobe After Effects (Volume 2)
AE.TUTSPLUS - Video Tutorials for Adobe After Effects (Volume 3)
AE.TUTSPLUS - Video Tutorials for Adobe After Effects (Volume 4)
AE.TUTSPLUS - Video Tutorials for Adobe After Effects (Volume 5)
AE.TUTSPLUS - Video Tutorials for Adobe After Effects (Volume 6)
AE.TUTSPLUS - Video Tutorials for Adobe After Effects (Volume 7)
AE.TUTSPLUS - Video Tutorials for Adobe After Effects (Volume 8)
AE.TUTSPLUS - Video Tutorials for Adobe After Effects (Volume 9)
AE.TUTSPLUS - Video Tutorials for Adobe After Effects (Volume 10)
All My Posts Here