

Limit/toggle/touch/tilt switches/modules with PIC16F877A MCU
Limit/toggle/touch/tilt switches/modules with PIC16F877A MCU
Published 6/2025
Duration: 2h 12m | .MP4 1280x720 30 fps(r) | AAC, 44100 Hz, 2ch | 1.32 GB
Genre: eLearning | Language: English
Published 6/2025
Duration: 2h 12m | .MP4 1280x720 30 fps(r) | AAC, 44100 Hz, 2ch | 1.32 GB
Genre: eLearning | Language: English
Programming using MikroC for PIC. PIC16F877A microcontroller. Limit/toggle/touch/tilt switches/modules (digital inputs)
What you'll learn
- You will learn how to interface a limit switch, tilt modules, touch buttons and toggle switches with a PIC16F877A microcontroller.
- You will learn how to do the programming of limit,toggle,tilt switches and modules with a PIC16F877A microcontroller using MikroC for PIC.
- You will learn how to use basic electronic components to make a circuit to wire up and connect these switches and modules with a PIC16F877A MCU.
- You will learn how to make use of limit switches, toggle switches, touch buttons/modules with a microcontroller for making commercial projects.
Requirements
- Beginners having an intrest in learning electronics and microcontroller based projects.
Description
Hello Guys,
Welocme to this course.
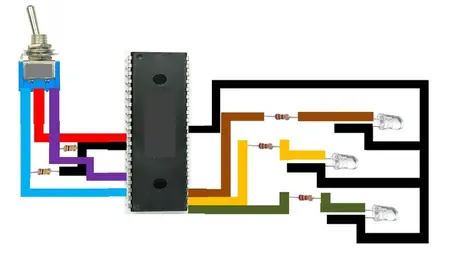
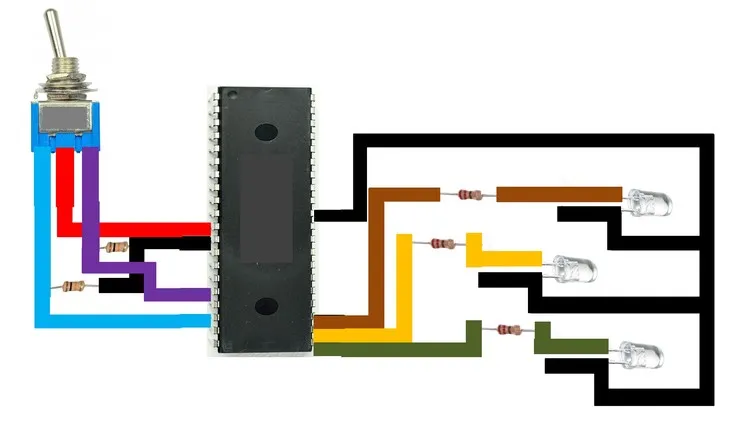
This course is about interfacing Limit/toggle/touch/tilt switches/modules with PIC16F877A microcontroller. Here you will learn how you can interface a PIC16F877A microcontroller with various input switches and modules like tilt switches KY-020 or 3 pin toggle switch or a limit switch. Then you will learn how to wire these up with the PIC16F877A. Like how you use some basic electronics like a pull up or pull down resistor to make the switch to send either a 0 or a 1 to your microcontroller for programming. Once we setup the hardware then we will do programming on the MikroC for PIC compiler. After programming we will use PICKIT 3 programmer tool with a PICKIT 3 to burn this code into the microcontroller.
So, inshort this course will give you the required skill set to make any project using these sensors and modules in the future.
Following is the course outline:
Introduction to PIC16F877A.
Lecture 1: Why PIC16F877A ?
Lecture 2: PIC16877A a basic introduction.
Lecture 3: How to extract useful information from PIC16F877A's datasheet.
Lecture 4: Setting up a hardware to program a PIC16F877A microcontroller.
Downloading and installing MikroC for PIC and PICKIT 3 programmer tool.
Lecture 5: Downloading and installing MikroC for PIC programming tool.
Lecture 6: Downloading and installing PICKIT 3 programmer tool.
Limit switch based project with PIC16F877A microcontroller.
Lecture 7: PIC16F877A interface Limit switch.
Toggle switch based project with PIC16F877A.
Lecture 8: PIC16F877A interface 3 pin toggle switch.
Touch button and modules based projects with PIC16F877A.
Lecture 9: PIC16F877A interface TTP223 capacitive touch button.
Lecture 10: PIC16F877A interface TTP-223 resistive touch button.
Lecture 11: PIC16F877A interface capacitive touch anti interference button.
Tilt switch/module based projects with PIC16F877A.
Lecture 12: PIC16F877A interface KY-020 tilt switch.
Lecture 13: PIC16F877A interface mercury tilt switch module KY-017.
Who this course is for:
- Electronic students, electronic hobbyist and anyone with an intrest of making projects electronics and embedded systems for earning money.
More Info